I got these images seriously out of order! Oh well, you'll get the idea.

The first step is to decide where we want the tree to fall and then cutting a notch on the front side of the tree (in the direction of the fall). Walt then goes to the back side of the tree and starts the cut while I push in the direction we want it to go - sometimes that works and sometimes that doesn't work like we hope - but we're always hopeful!

This one's down! Perfect. On the road where we can get to it easily and didn't get hung up in some other tree as it went down - that's the worst and hardest situation we have to deal with. What a job that is to get that sucker down on the ground when that happens.

This one looks WAY heavy. Not one I'm going to attempt to carry.
Well, it's not exactly a woodcutters' ball, but we certainly do enjoy it. Going after our winter supply of firewood is one of our favorite things to do each year. Walt was recovering from a broken shoulder blade and 9 broken ribs, so he was unable to do the work last year, but he supervised his two brothers, Ty and David, who came to do that for us. What a great time we had! Where are you this year, you guys! We're missing all you.

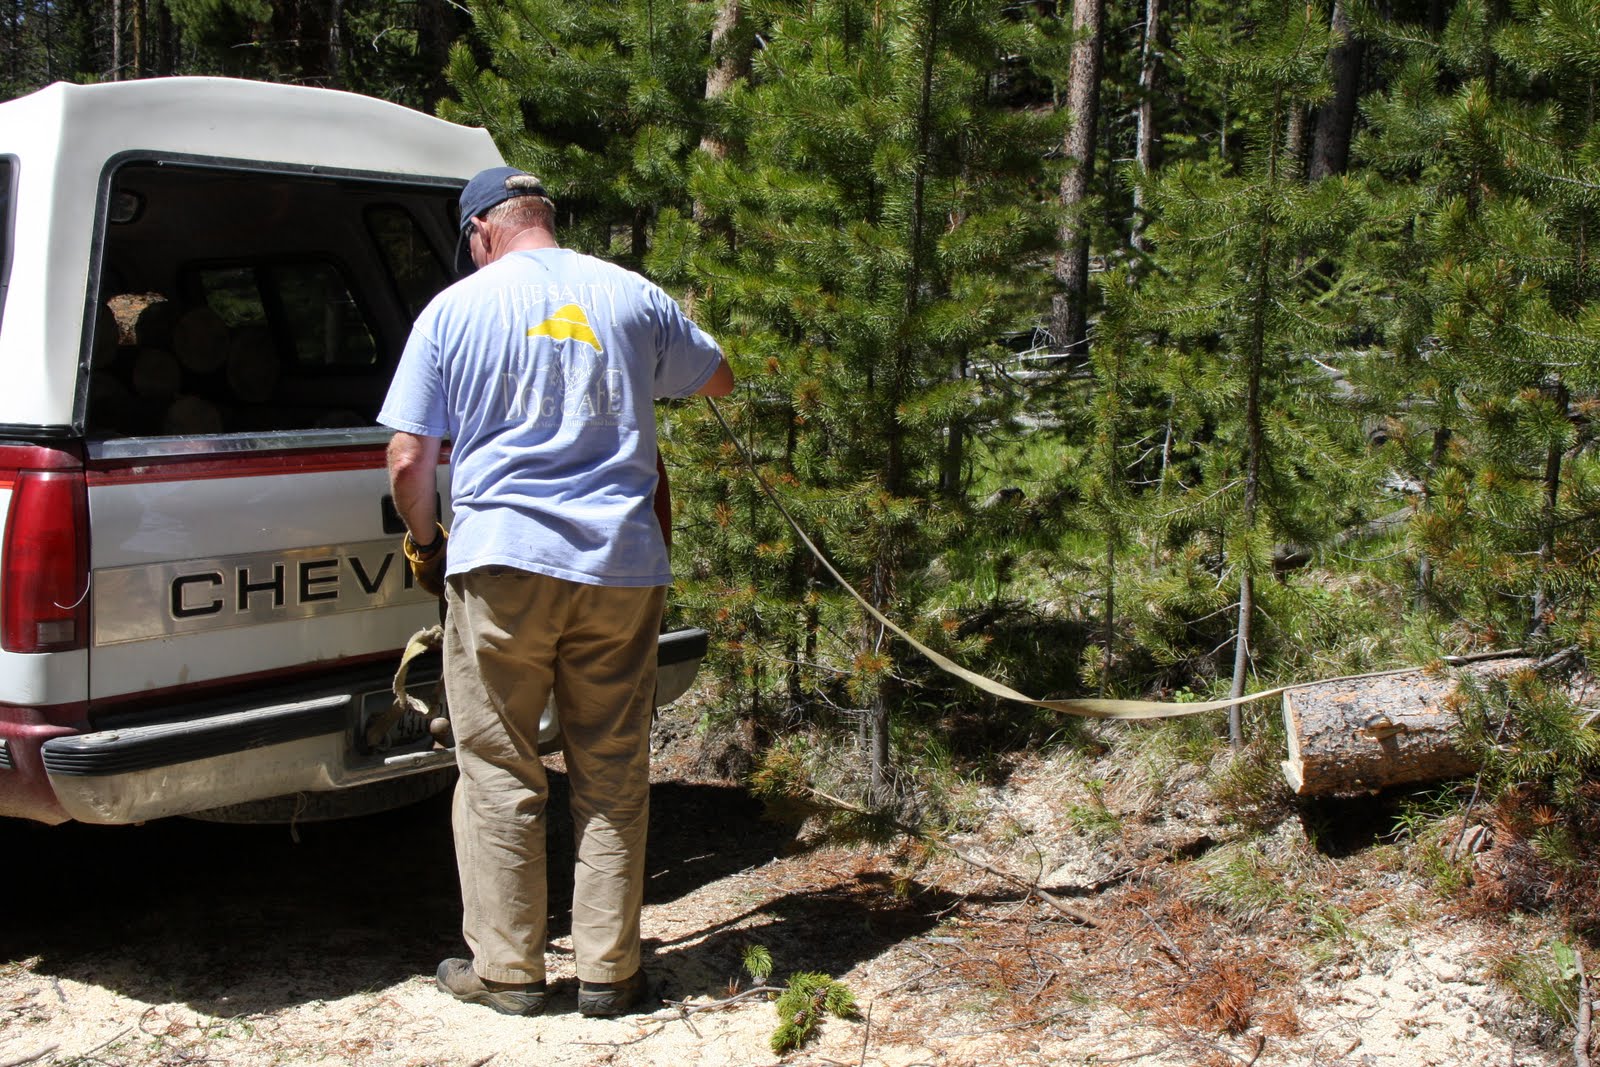
Here's the basic tools of the trade: his and hers chainsaws, oil and gas mixture for each saw. Then we include a measuring stick marked at exactly 17 1/2 inch increments as our fireplace is 18 inches deep, so we block every log to fit. Perfectly. We also use a come-along and web straps to pull down some problem trees and to move them when they've fallen in difficult areas or far from the road.

This is the area where we were cutting yesterday. Close to our house, but deep in the forest. Love it!

It's so beautiful up there. It's never a chore.

This one we were able to put down on the road which makes it very convenient for loading - once he gets all that stuff cleaned off it. We look for trees that have a minimum of branches that have to come off before blocking.

We've blocked all the easy stuff, so we are now preparing to pull the rest of this tree on to the road so it will be easier to work with.

Part of the moving process.

Now it's out there where we can work on it. Walt, what are you doing back there???

This was a leftover chunk from the day before that we had to finish blocking. This tree was about 24 inches at the base. Lots of work getting those hummers blocked up - including splitting them - this one into fourths - when we get them home.

I didn't get to help out with my favorite job when out there which is sitting on the log while Walt saws in order to keep the log from rolling and moving around. . . . Nice work when he lets me do it!

Some of my other jobs include holding the measuring stick while Walt marks his cuts, and of course I do a lot of the carrying and loading the blocks into the pickup - believe me, that is the easy job compared with bending over with that heavy chainsaw cutting the logs for all the hours we are out there. That's the hard part. The exhausting, wearing out part.

This was some tree. Not sure why Walt loves these babies so much. . . .

This tree was killed by the pine beetles that are currently destroying our forests. You can see the rot on the inside.

The black ring on this tree clearly shows how the pine beetles kill our trees. Attack the bark and the tree dies.

Truck is almost full - of a pine beetle-killed tree.

Here we see Walt starting the splitting process on one of those huge blocks. I can't get them into the fireplace when they're this huge, so they have to be split in order for me to deal with them. (Remember, you can click on the images to see them full-size.)

Almost there. He does it the old-fashioned way - with a wedge and a sledge hammer.

It's half done!

Into the wood shed. The wood shed holds 8 rows (8 cords) and we will go through most of that in a normal winter. This year we had 2 rows left. As of today we have 5 rows in. We can usually do one row in a pickup load, so we have at least 3 more woodcutting days. But probably will do one or two more than that in order to stack up a pile of 6-foot poles that we can block later for some extra if we need it and also to get a load of small stuff for the cookstove in the kitchen. Love that kitchen stove for warmth and for bread baking! Then we can rest from our labors! Well, at least that job.
 I decided to borrow it and build on it a little.
 So here's the result. I cut out some cardstock about gift tag size, punched a hole, added an embossed sticker and a strip of ribbon and
 tied them on my mini loaves of rhubarb bread that I baked for the bake sale at the fire company this weekend.
 Not bad! Great idea, Katie. Thanks. These should sell fast just because they're so attractive! Lovin' it!


.JPG)